-
Audio
-
Guitar
-
Bass
-
Blog
-
SALE
- Financing
- Support
- SINCE 1946
November 03, 2015
The first consideration when preparing for a live gig is having the correct setup for the task at hand for a smooth running gig. It is important to get a rundown of what you are going to need for almost any gig. You would rather have too much than not enough. Remember, every gig is different and equipment will vary but the following is what you will need for every gig:
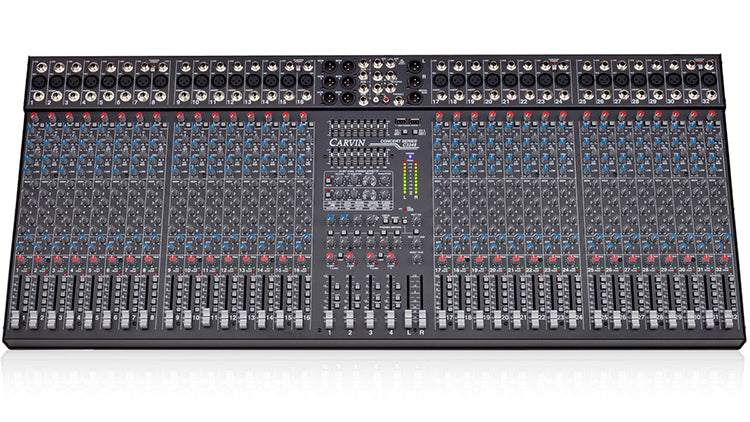
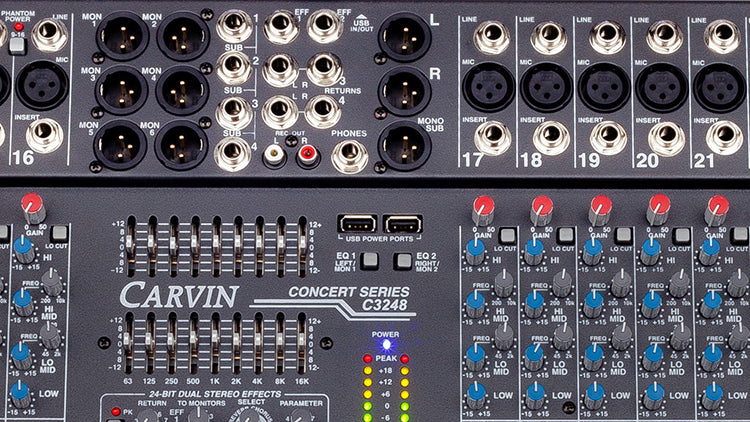
Mixer - The number of channels, returns and auxiliary sends (or monitor sends) needed can vary depending on the band.

Monitors – every band needs to hear what is playing. Avoid monitoring problems and bring enough for everyone. Not having monitor problems brings you one step closer to a good run.
P.A. - If you don’t own your own system you are probably renting. Most rental professionals that rent gear know the venues or with a good description can recommend the appropriate system. Even if you own your own, you know that a small club isn’t the place for your large line array. Don’t let the bigger is better mantra tie you into more than you need to bring or rent.
Other Equipment - When working using digital mixers, all the compressors and effects are built-in, making the process of inserting them a breeze. With analog mixers, this means having an effects rack with compressors, gates and multi-effects. Gates / Compressor units for the kick and snare, gates for the bass and toms, and compressors for the vocals will be necessary, not to mention the multiple uses for reverb and EQ.
Quality Cables - The rule is that a complex system will usually be your biggest pain in the backside. Always bring a back-up or multiple backups for every cable that you need. You never know when you will need them.
Check, Check, One, Two
A checklist will help the band get the mixes they need. A good checklist will ensure a smooth process. The stages for a successful check are as follows:
Line Check
The foundation of a line check is to create a stage plot and a mic input list, one for the stage box and one for the mixing console. Plug in mics and direct boxes according to the list, and bring up one channel at time and listen to each over the house loudspeakers or headphones for noise. Checking as you go can save time if you have help. If it is just you, and you plug everything in all at once, you will need that input list to do any trouble shooting. If you get permission from the band, have someone strum or tap each instrument to give you a level, then have them talk into each vocal mic and raise the level to check for feedback.
Troubleshooting
If you have no signal, check that the mics are plugged in and in the right channel. Is the channel muted or not routed to the right bus? Is the musician’s volume turned up? Are the cables working? Are the guitar cords working? Are the batteries fresh? Is the phantom power switched on for that condenser mic?
Noise – If you find a hum or buzz, you may have an open circuit, a bad cable, picking up the guitar amp hum, a ground loop in a direct box, volume too hot on a guitar, or a compressor stomp box is producing too much gain with no signal present. Checking these is a one at a time process and can help you discover what the problem is.
If you have distortion, make sure that a channel isn’t clipping, there isn’t too much gain on a stomp box, and the cables are good.
If you hear crackles, you most likely have a bad cable, a cold solder joint, or a dirty cable connector. But don’t dismiss condensers, they may need batteries or the mic capsule tightened.
Ready, Preset, Almost Ready to Go
At this point you start to dial in some levels and EQ. The first thing to know is that the biggest sin is feedback. It's expected that a professional engineer will not generate any kind of feedback. Never allow feedback during a sound check by turning a knob quickly. Additionally, never un-mute a channel when its gain is way up. Use a slow and deliberate approach to avoid unpleasantness.
Start right by keeping faders and monitor sends set very low. Also, set the gain trim for each instrument and vocal. With faders up, set the monitor level and preliminary EQ for musician #1 and repeat for each musician. You also want to set up a drum sub-mix and vocal sub-mix allowing the band to play. This is a good time to set up the house mix. Adjust the monitor mixes as requested.
Remember that it takes a rather unregulated effort to get your mics to feedback if the system has been set up correctly. Some common feedback sources that may present themselves in the mix are:
Vocal Mics - You need to filter below 90Hz on the vocal mics, sometimes even up to 160Hz if you've got subs under the stage. Keep an ear, better a finger on the lead vocal mic so that you can dip it if you're short of headroom and it starts to feedback.
Instrument Mics – This is a mic that may have been moved or kicked and can feedback right away.
Floor Toms - Make sure the gates are set right or you'll get some nasty bottom-end feedback.
Reverb Returns - Bright reverbs on the vocals can add too much top to the vocal causing feedback, so go easy.
We are now left with the balance between stage level and house mix. Controlling stage volume starts with getting the gains and monitors dialed in for each musician.
Set Gains
Start with the faders at 0dB (unity gain),monitor sends down and L/R (Main) fader(s) down but not off to prevent feedback as you are adjusting the gain trims, and let the band know you are ready for the sound check. Ask musician #1 to play or sing as loud as they will during the performance. A recommended method is use the PDF (Pre-Fader listen) button or pre fader channel meters to slowly turn up the gain trim, so it hits the 0dB meter reading. This will allow for plenty of EQ, vocal dynamic level changes, and inserted processing headroom. Remind the musician not to change their volume control setting between now and the performance. Repeat for each musician ending with the drummer and all singers together to set sub-mixes.
The Monitor Mix
Adjust each performer’s monitor mix so they can hear themselves and anything else they need to hear. This is not the same as the house mix. Ask each player what they require and if the monitors seem “hot” or start to ring, turn down the master monitor send a little.
Some musicians are sensitive to tonal balance and may want less bass, less mids, more highs, and you can tweak the graphic EQ that is feeding the monitor power amp to accommodate.
There is usually a lot of bass from the house loudspeakers, so they may not need much bass in the monitors. You can usually roll off or filter out the lows in the monitors, which also reduce rumble and feedback.

House Mix
Another no-no is having way too much sub in the mix. Set the bass to a sensible level and leave it there. If you used high-pass filters to stop unwanted signals getting to the subs it’s a nice start, but remember that the front row is usually right in front of the subs and you'll make it a very unpleasant night if you put too much sub in the mix. Keep it sounding natural and solid knowing you need no more than that.
Check that all the mics and DIs are connected to the right inputs and working okay. Perform a sound check to set the levels, EQ and mix, to ensure everything is sounding great.
The Show
When the show starts, get the vocals right first and then move to the drums and bass to get them right. With the vocals and rhythm section on point, getting the guitars, keys and backing vocals right is crucial.
Avoid overloading the desk. Most amp racks will be protected by the system controllers, but the desk itself usually isn’t. If you overload it, you will hear it. Don’t clip the channels and keep an eye on the master output meters. If it sounds a bit nasty, you are probably pushing too hard and eventually could just shut down.
Remember to kill the FX returns between songs. Put all your FX returns on a VCA and mute it between songs.
Always do your research, it will be easier if you know the music and keep the vocal sounding great. A badly equalized vocal makes the experience unpleasant.
Trust your ears. Make sure you hear the lyrics and it sounds natural. A good rule is to not boost EQ but cut it first when looking for a solution.
You Don’t Have to Go Home…
Proper etiquette, if you are running a house system or someone else's system and you want to be asked back to run sound, is to "Zero Out" the mixer. The next engineer or house sound engineer will expect the board to be "Zeroed" when he arrives. If the next sound engineer is present you can ask if he wants to you to leave your mix settings.
Finally, say goodbye to the technicians and the house engineer with a hearty thank you. Chances are you will meet again. Finally, make a point of speaking to the artist(s) and ask them how they enjoyed the show. They will be pleased you care about more than your mix.
October 13, 2025
Carvin TRC Active Column Array System features and setup video. Watch this video to discover the features and benefits of our active column array sound system. TRC Powered Column Array Systems offer portability with high SPL levels that project up to 400’ with exceptional clarity. Unsurpassed high frequency and deep bass response will place the audience in the center of your performance. TRC Systems are scalable and are available in 2000W, 4000W, and 8000W models.
June 18, 2025
Carvin Audio teams up with Red Bull to provide audio for the VIP experience in Des Moines for the 2025 Soap Box Race Iowa. The TRC Active Column Array System was used for the event.
June 13, 2025
The Carvin TRx5000 Series Line Array System was deployed for the Sheffield School of Dance annual recital at the Mitchell Center on the campus of the University of South Alabama.
Sign up to get the latest on sales, new releases and more…
NoFraud Frequently Asked Questions
"Make a joyful noise unto the Lord all of the earth; make a loud noise and rejoice and sing praises. Sing to the Lord with the harp and the voice of the psalm." - Psalm 98:4-5
© 2025 Carvin Audio.
Carvin Corp.
POS and Ecommerce by Shopify
